Choosing The Right Truck Tires

The difference between truck tires and passenger car tires

Truck tires and passenger car tires are different in construction, and these differences are designed for their intended use and performance.

The first and most obvious difference is that truck tires are simply larger and wider than passenger car tires. Beyond this obvious difference a key distinguishing factor is that passenger car tires (and light truck tires placed on SUVs) typically have two steel belts. Medium truck and bus tires have four steel belts. The doubling of the steel belts in truck tires makes the truck tires more robust and durable.

A truck tire may have 20/32nds of tread or more. When such a truck tire is halfway worn down to 10/32 of tread it still has an amount of tread available which is similar to what many passenger car tires have when they are new.

Truck tires commonly have under-tread or sub-tread between the tread itself and the top steel belt. Many truck tires are marked as “REGROOVABLE.” This means that when the tread wears down to a level which is below the legal limit deeper grooves can be carved into the remaining tread rubber to allow for continued use of the tire.

When a tire is marked “REGROOVABLE” it also means that it is capable of receiving another layer of tread after the original tread wears out. This is a process different from regrooving.  When a tire is RE-TREADED the original layer of tread is cut off the tire and a new layer of tread is sewn onto the tire allowing for the body or carcass of the tire to continue to be used for additional mileage.

The inner-liner of a truck tire is thicker than the inner-liner of a passenger car tire or light truck tire and typically has a higher halobutyl content to ensure that pressurized oxygen from the inner chamber of the tire does not permeate into the body of the tire and cause degradation of the tire components.

Because of these significant differences tire manufacturers do not make any service life recommendations with regard to truck tires and consider that they may be used for an unlimited number of years provided there is sufficient tread available, and that they have otherwise not been damaged or abused.

Most tire manufacturers provide service life recommendations with regard to passenger car and light truck tires indicating that even tires in spare wheel positions which have never been used be taken out of service after 10 years. We have been unable to locate any such service life recommendations for truck tires by any manufacturer.

Because of the differences in the way truck tires are made tire manufacturers do not issue warnings or recommendations about the chronological age of a truck tire.

Light Truck and a tire used on light trucks

What is a light truck?

A light truck is a United States federal classification for trucks or truck-based vehicles with a payload capacity of under 4,000 pounds (1,815 kg). Light truck class includes:

  • Vans – most mini vans and full sized vans.
  • SUV’s – Mini SUV’s, Compact SUV’s, Mid size SUV’s, Full size SUV’s, Extended length SUV’s.
  • Light duty pickup trucks.

In other countries words usage and meanings are quite different.

Tires applied on a light trucks

These vehicles and tires are specially constructed to carry more passengers and/or cargo than passenger cars. Technical features of light trucks different from passenger cars are:

  • Off road design.
  • Increased ground clearance (higher center of gravity).
  • 4×4 or all-wheel drive capabilities.

Tire design for light truck applications is determined by these features. Tire designers have to meet expected service conditions, loading and other factors referred to particular vehicle.

Tires for light truck applications can be classified in two groups:

  • Tires specially designed for light trucks (with LT in size designation) and
  • Passenger car tires applied on a light trucks (with P at the beginning of size designation or without P if the tire is European metric).

Trailer Tires & Wheels

Whether you’re towing a boat or driving an RV, you need the proper tires to safely make the journey. Trailer tires rated ST, meaning Special Trailer, are designed to carry heavier loads than passenger or light truck tires. Trailer tires are also engineered to prevent fishtailing and to dissipate heat that builds under the pressure of significant weight.

Trailer tires are distinguished by a solid center rib. This center rib provides uninterrupted contact with the road, allowing greater stability for your trailer. These tires also feature stiffer sidewalls, which up their carrying capacity and reduce sway. A higher grade of belts, wider belts and more plies further enhance capacity and guard against damage.

Trailer Tires & Load Range

A few different rules apply when it comes to trailer tires. Since they don’t have UTQG (Uniform Tire Quality Grade) ratings, instead, they’re branded with a load range on their sidewall — a letter mark that tells you the ply rating and the max inflation to inflate the tires.

  • B 4 ply rating 35 psi
  • C 6 ply rating 50 psi
  • D 8 ply rating 65 psi
  • E 10 ply rating 80 psi

A combination of this rating and your tire’s size determines how heavy of a load they’re rated for. For example, “B” load range tires size ST175/80R13 inflated to 30 psi can take on a maximum load of around 1,000 pounds, and “E” load-range tires size ST235/80R16 inflated to 80 psi can take on a maximum load of around 3,400 pounds. Multiply that weight by the number of wheels on your vehicle for total load capacity. Whether you’re outfitting a horse trailer, pop-up camper or RV — know the combined weight you’ll need your tires to support before you shop.

Caring for Trailer Tires

To get the best out of your trailer tires, make the time to maintain them properly.

Don’t park your trailer fully loaded. If you are able to, raise the trailer so the tires are in the air. If that’s not an option, regularly move the trailer by a foot or two, to give the wheels a quarter or half revolution. This will help prevent flat spots from forming in the tires.

The sun can also cause the rubber compound of your tires to breakdown, so park your trailer inside a garage or under cover on flat pavement. Keep them clean by removing solvents, such as oil or grease, which are known to damage rubber.

Trailer tires are designed differently than vehicle tires. Consider these basics before you purchase your next set of trailer tires, so you can better enjoy your adventures.
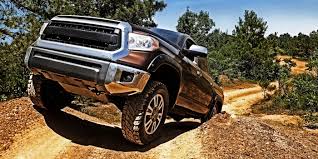
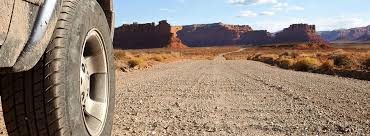
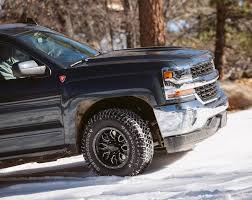
Off Road Tires

Off-road tires come in different levels of capability that address various needs. There’s no one right tire for a given surface, but many off-road tires perform amazingly in numerous settings. You’ll want to select your set according to the terrain you intend to drive on, how frequently you’ll be off-roading, and the weight capacity the tires must possess. The main tradeoff with off-road tires is the generally softer rubber compound doesn’t deliver tread life. Also, the knobby pattern makes for a louder ride on highways. But, when you’re scaling roads in the backcountry for a day in the wilderness, you won’t care one bit.

All-Terrain Tires

Any style of off-road tire can be driven on roads, but all-terrain tires provide good performance anywhere. Their tread blocks are made with enhanced compounds to provide traction not just on every surface but also going every direction—tight turns on uneven surfaces, backing up out of mud, ascending a gravel trail, etc. Grooves run around the circumference of the tire and laterally, creating channels to disperse rain, with aggressive tread patterns to grip even loose sand.

You can find On/Off-Road All-Terrain tires in all-season models, which even combine a quieter ride with grip in cold conditions, including snow. Check the load capacity, however, to be sure they’re capable of carrying the vehicle manufacturer’s required weight, as well as any heavy loads you intend to haul. Other styles feature greater durability, such as resistance to cuts and chipping.

Commercial Traction Tires

This style of off-road tire is developed for light trucks and commercial vehicles. Their tread blocks are heavier duty than all-terrain but with the same combination of circumferential and lateral grooves to provide traction on paved and unpaved surfaces. This is the tire you need on your full-size work truck, or any light truck delivering materials to the job site.

You’ll see that On/Off-Road Commercial Traction tires have reinforced sidewalls that get them rated for heavy loads. While your commute may only require you to drive off-road a dozen yards or so, you may want the extra traction. You can also find this style with sipes (thinly cut slits) in the tread specifically for traction in heavy rain and snow.

Maximum Traction Tires

Maximum traction tires are commonly called mud tires, since they’re normally the best solution to off-road obstacles like troughs of mud, ruts, and rocky trails. Oversized, with an aggressive pattern of extra-large lugs, mud tires are for anyone looking to cut loose with their truck or SUV. In addition to mud, they also allow you to handle soft sand, winter slush and snow.

Tire Maintenance

An integral part of your vehicle’s safety relies on your tires. Additionally, there are many other factors that relate to vehicle safety such as brakes, steering components, and more. For this reason, it is very important familiarize yourself with ways you can protect and maintain them. The easiest maintenance is to perform a monthly visual inspection and air pressure check. There are also other steps like tire rotation, proper alignment, and safe driving that are equally important.

Visual Inspection

A visual inspection means checking tire treads for punctures, signs of irregular wear, or low tread depth. You will also want to check the sidewalls for signs of damage, such as cracking, scrapes or cuts, or bulging. These problems may result from impacts or aging.

It’s advisable to have a professional inspect your tires right away if you see such signs. If the problem is severe, replace the tire with a spare to get your vehicle in for service. Remember a tread depth of 2/32” or less is considered in need or replacement.

Check Air Pressure

To check the pressure, you’ll simply need an air pressure gauge. Your tires have a manufacturer recommended air pressure that can be found in your owner’s manual or on the door jam placard, measured in pounds per square inch (PSI). If your tires are low, you can fill them at any air station or visit your local tire dealer for assistance. Or you can visit a tire retailer. Most places will refill your tires with air for free.

Underinflation and overinflation are known to cause patterns of irregular tread wear that greatly reduce the tread life of your tires. Underinflation also causes decreased fuel efficiency, and increased heat buildup that can prematurely degrade the structural integrity of your tires. Changes in elevation and temperature can cause a significant change in the air pressure of your tires. So check your air pressure on a monthly basis and be sure to do it before any long drives.

Tire Rotation

Because your front and rear axles create different patterns of wear for your tires, it’s essential to rotate your tires. Rotating your tires is the practice of switching the location of your tires on your vehicle. The industry standard recommendation is to rotate your tires every 5,000 to 6,000 miles, or whenever you get your oil changed.

Tire rotation can be done in several patterns:

  • Bring front tires to the rear and rear tires to the front
  • Switching tires diagonally
  • Bring the rear tires forward and switching the front ones diagonally to the back

The important thing is to vary the areas of wear on each tire—to preserve them, and to ensure good grip.

Biggest Home Renovation Mistakes

Mortgage and insurance questions to ask yourself before renovating your home

Here’s a horror story you might have heard before: a young couple decide to renovate their new house. They choose new tiles, re-do the kitchen and knock out a wall. But halfway through pulling out the bathroom tub, their bank account runs dry. They head to the bank to borrow more money – and are rejected.

To avoid this fate, it’s important to know the ins-and-outs of how your reno might affect your home loan, borrowing power and home insurance. We asked our property expert Steve Jovcevski to share some need-to-know insights, and came up with these key questions you should be able to answer before bringing out the tool belt.

Does my home loan lender know I’m renovating?

The answer to this should almost always be: yes. You may not need to let your lender know about a reno if it’s something minor – like a new coat of paint – or if you are 100% certain you have the necessary funds to finish the job. Otherwise, you should always let them know, just in case.

How am I paying for the renovation?

This will mostly come down to what kind of changes you want to make and how much it will cost. For example, if you’re repainting, you might pay for it out of your savings. If you’re re-doing the carpet, you might take out a personal loan.

What happens if I run out of money?

Uh-oh. So you’re halfway through gutting your bathroom or ripping a couple of walls out, and your renovation fund runs dry. Your first step is probably to approach the bank for more money – but unfortunately, a lender may be reluctant to give you any more funds, in case you can’t finish the job.

Boost the value of your place with these DIY renovations

Home renovation jobs can be endless from small scale tasks such as replacing light fittings to larger sized changes like building a pool! However, if you’re looking to add value to your home you don’t necessarily have to turn to the mammoth jobs requiring builders, architects and tradies. There are plenty of jobs you can do yourself! So pull out some old rags and get cracking on these DIY renovations that home reno experts say add value.

Get painting

A fresh coat of paint can go a long way in boosting the value of your home by making it look crisp, clean and more appealing. By selecting light colours for smaller rooms you can actually make them appear larger! Don’t just do one room though, complete the job on the whole house as one freshly painted room will make an adjoining room look even older and tacky. Painting the interior walls of your home can be a satisfying task done over a weekend.

Create a grand entry

By this we don’t mean you have to erect, large marble pillars or life-size animal sculptures imported from Italy, you just need to create curb appeal. As we all know, first impressions last forever! Here are a few hints on how to make it happen:

Replace the front door and don’t forget the doorknob! According to the Cost vs Value report by leading US renovation magazine Remodeling, a new front door gives you the best bang for your buck.

Paint the front door

Do a letterbox makeover

Buy a new house number

Replace the overhead light at the front door

Add colourful flower beds to the front garden

Add another bedroom

Regardless if you’re planning to sell or rent your home, creating an additional bedroom is an easy and quick way to increase its value. Potential buyers and renters typically hunt for a property through online platforms – Domain, property.com.au and realestate.com.au – entering specific searches like room numbers. If you have an old dusty attic, it’s worth taking the time to clean it out and convert it into a bedroom, such as a parents’ retreat by installing insulation and windows. Or, if you have a basement that’s full of cobwebs, dust it out and turn it into a spare room. Just like that, you’ve added value to your home!

Refit the kitchen

The kitchen has become one of the most popular places in a home, with plenty of time spent in it cooking, entertaining and chatting with family and friends. Better Homes and Gardens says the kitchen deserves “special” attention, so a neat, modern looking kitchen can genuinely improve the value of a home. It’s important to focus on benches, cabinets, drawer fronts and handles by either replacing or recovering them. A kitchen can also be transformed and modernised by replacing or adding a splashback with glass or tiles. After all, it is the most visible part of the kitchen!

Green renovation tips for a more sustainable home

Renovations are the perfect opportunity to make your home green and sustainable. Creating a sustainable home is no longer just a trend, it’s part of our daily lives and crucial to reducing the impact we have on the environment. It doesn’t matter how small or large the renovation is, there’s always an opening to lighten your environmental footprint for short and long term benefits.

Quality, environmental and sustainable design principles will save you thousands of dollars on energy and water bills while creating a more livable and healthier home. So follow our guide on how to incorporate sustainable principle designs into your home renovation.

Environmentally savvy, green pros:

Once you’ve made the conscious decision to renovate a green and sustainable home you need to find the professionals who practise environmentally friendly methods. There are plenty of designers, builders and architects to choose from but you need to take the time to shop around and find the ones who have the same ‘green’ mindset as you. Check the qualifications of the builders or contractors you are hiring and make sure they have proven sustainable design case studies along with being across the green building regulations in your area.

Passive design:

A passive design refers to the design of a home that needs little if not any artificial cooling or heating. To implement a passive design, it’s important to understand the seasonal weather patterns of the area where you live. Once this is established the rooms in the house can be structured so they are a comfortable temperature all year round requiring minimal cooling or heating mechanisms. Passive design elements include; orientation, insulation, airflow, double glazing and thermal mass. And the good news is, it costs little or nothing to incorporate passive design into a home.

Material selection:

Here are a few ideas to assist your decision making around materials. These concepts will help create a sustainable home.

1. First off, where possible look at re-using existing building materials to minimise waste. If you knock down a wall, use those bricks for paving or if you pull up your floorboards there’s perfect material to build a fence. Get creative!

2. When purchasing the materials for your home renovation choose environmentally, sustainable friendly products. Always read the label carefully, as ‘natural’ and organic’ products may only contain a small percentage of natural ingredients. Also try and avoid building materials that leak toxic waste such as particular paints and glues. 

3. Look for renewable resources, such as timber from a sustainable managed forest. Also consider the lifespan of these materials. There’s no point going with a material that may only last a year

Renovation tips for investors looking to flip

Who doesn’t like to earn a quick buck? The renovate and flip strategy is all about just that. It’s the concept of buying a rundown property below market price, jazzing it up to increase its value then reselling it just months later for a fast profit. It’s easy said than done and keep in mind, a flip can flop. However if you’re looking to flip follow this guide for renovation tips and more so you finish sunny side up!

Location, location, location

Find a home in a desirable, sort after neighbourhood or city where people want to live. Research and find areas with rising real estate sales, employment growth and good schools nearby. There’s no point in buying a place in a run-down suburb that may fall off the map!

Structurally sound

You don’t want to purchase a place that’s about to fall to pieces, as that will just cost you a lot more money to renovate from scratch and the probability of making a profit decreases. Look for a property that is in a good condition structurally. It’s always a good idea to bring a builder, plumber or electrician with you to check out the place as they’ll have a good idea as to the state of the home’s structure.

Close to your home

If you invest in a place that is far away from your home and you have to spend an hour or so commuting back and forth each day than making a quick profit becomes a long shot. You’ll also spend lots of money on petrol when it’s all about making money. So look at investment properties that are relatively close to where you live.

Don’t buy at or above market value

Aim to buy at below market value, preferably at the low end of the market. If not, you won’t make money! Look to buy a run-down property in a great neighbourhood as opposed to purchasing the best house in a poor neighbourhood.

A makeover

In order to resell the investment property for a higher price, it must be in need of a good makeover. Before you even purchase the property have a good idea of several ways you can make cosmetic changes to the place to increase its value. As we mentioned above, you don’t want a place that requires mammoth renovation tasks.

The Biggest Renovation

Looking at updating your kitchen, bathroom or garden this year? Well here are some renovation trends to consider so your home makeover is modern, chic and most importantly a place where you want to spend time. Let us take you through the sizzling kitchen trends, hot bathroom fads, fashionable interior designs and renovation garden fazes

Larger and more spacious

Gone are the poky, small kitchens that were once the trend of the 70’s and 80’s. Now just think, the bigger the kitchen in 2016 the better. This year kitchen renovations will involve knocking down walls to increase the space and by doing this is opens up the area to integrate it with the dining and living rooms.

Silent and metal range hoods

If you’re going to have a spacious open-plan kitchen the last thing you want is the annoying hum of a range hood. So the experts are suggesting you choose a range hood with an external motor that can be installed on the outside of the house or in the roof. Here’s to a little piece and quiet while you cook!

Hi-tech

I’m sure we can all admit to having some sort of device with us in the kitchen when cooking up a storm. Even if it does end up with flour or other baking products all over it! So in 2016 the kitchen will become a smart space. There will be designated spaces to store and charge your phone or tablet so they’re always at arm’s reach when you need to pull up that favourite online recipe.

Light it up

Let your kitchen shine in 2016, especially if you’re putting lots of money into renovating it, why not show it off with lots of lights! Illuminate the kitchen bench with a pendant hanging from above or brighten the cabinet with lighting. Ceiling lights are merely a thing of the past.

Double Kitchen Sink

Most Dangerous Things in Your Kitchen You Didn’t Know About

There are things we use in our kitchen every day. They are very ordinary and seem to be quite harmless, and we have never thought about how dangerous they can be. Bright Side decided to share this important information with you. It will definitely change some of your habits.

To make the plastic flexible, some manufacturers add special chemicals, which can cause serious health problems. We are pretty sure you don’t want these chemicals in your food or in your body.

If food particles from your dishes stay in your sink for some time, they start creating a breeding ground for bacteria like salmonella and many others. The kitchen sink can be a really dirty place.

Your knives should always stay sharp. If they are not sharp enough, they may slip when you try to cut something, damaging your hands or other body parts.

The average kitchen sponge grows bacteria very quickly. Rinsing it doesn’t prevent harmful pathogens from multiplying. To kill bacteria, you can microwave the wet sponge or soak it in diluted bleach for a couple of minutes. Or just put it in the dishwasher on the longest and hottest cycle.

How to Choose a Kitchen Sink

Choosing a sink which works for your lifestyle – not to mention complements your interior scheme – is key to the smooth running of the kitchen

Few of us today find ourselves chained to our kitchen sinks, washing up the dishes (thanks to our dishwashers), and yet the sink still plays a vital role within the modern-day kitchen.

Thinking about how you use a sink on a daily basis – and perhaps how sinks in previous homes have met or failed to meet your needs – is a good place to start when thinking about buying new. But the aesthetic a sink brings to the kitchen interior scheme is also a priority — the sink is after all a feature in its own right

Size and bowl configuration are among the first considerations.

If a sink is used very sparingly for tasks such as washing up, a single bowl (or ‘1.0’) may suffice. Single bowls are a good option for utility and/or boot rooms, and for kitchens short on surface space.

Many homeowners opt for 1.5 bowls and even two, which provide greater flexibility when it comes to tasks such as tipping away excess drinks whilst washing up, or for peeling vegetables.

Sink depth should be given some thought too. It’s often a case of striking a balance between a sink which will accommodate large pots, and one that isn’t so deep that it takes an age to fill up, or finds you uncomfortably leaning over, elbow-deep in water. If you’re opting for more than one bowl, choosing bowls of different depths offers flexibility.

THINGS TO KEEP UNDER THE KITCHEN SINK

This week’s organizing focus is the KITCHEN SINK. If you haven’t grabbed April’s FREE cleaning and organizing calendar yet, head on over to this post for a little more explanation.

Your challenge this week is to take 15 minutes to tidy up under your kitchen sink. Super simple task – empty it out, wipe it clean, toss or recycle anything that you no longer need or use, and put it back together.

If you feel like the area under your kitchen sink needs a little more love than that, here are 4 musts that I keep under my kitchen sink:

Kitchen Cleaning Supplies: Keep your kitchen cleaning supplies, tools, sponges, extra hand and dish soap, etc. under your kitchen sink. Easy access in the kitchen is key. I keep my sink scrub, cleaning recipe supplies, and other miscellaneous items under the sink to keep it handy for mixing up recipes too.

Lazy Susan:  I had an extra one and popped it under the sink a year or so ago- total space saving game changer.

Containers to Hold Tools:  If you have scrubbers or other little tools, use containers that can ventilate the tools properly in between uses.

Hook:  If you use dish cloths, put a hook on the inside of your door to dry damp dishcloths. When they are dry, I put them in a laundry basket for dishcloths.

Kitchen Essentials List

If you’ve ever attempted to purchase cookware for a new kitchen or simply tried to improve the quality of tools in your current kitchen you’ve probably found that stocking up on high quality kitchen essentials is much more difficult than it should be.

And this makes sense, doesn’t it? Nowadays everywhere we look there’s someone telling us to buy their product that will supposedly make our lives easier. I’m sure all of the following sound familiar:

Cooking TV show hosts recommending their products

Branded cooking sets from your favourite celebrity chef

Kitchen stores stocking unusual, “one-trick-pony” items

Infomercials aggressively selling cheap gizmos

Kitchen websites promoting every item as a “must-have”

and so on. Instead of all this increased choice making our lives easier, it’s made it that much more difficult to separate the quality from the junk. So we decided to test all the kitchen equipment we could get our hands on to solve this problem and make stocking a minimalist, high-quality kitchen as easy as possible.

When we started our cooking journey, we were full of confusion and frustration as we began our search for the best cookware and essential kitchen tools for minimalist cooks. When you start with no knowledge, the learning curve is immense.

But after years of refining our cooking techniques, creating and testing simple recipes, learning how to plan our meals, and building a customizable meal planning service for busy folks like us, we learned exactly which tools one needs (and doesn’t need) to stock a fully functional and multi-purpose minimalist kitchen.

Things to Never Put Down your Kitchen Sink

Your kitchen sink may well be the right place for some of the items you’ve collected, but unless you enjoy routine visits from a plumber for sink repair, there are some things that just don’t belong in your drainpipes. Here are of the worst, and please don’t think that the fact that you have a garbage disposal will render them harmless.

Pasta

Your drainpipe has a fixed width. Once you put pasta down the drain, it continues to absorb liquid and swell, taking up more space than you could have predicted. The cause of the swelling is semolina, a flour made from durum wheat. For the same reason, you should never put flour down a sink drain.

Rice

Like pasta, rice will continue to take in water. Imagine a cup of uneaten rice, soaking in water, getting soggier and sticker by the minute. It’s not hard to see why you would not want such a substance in your pipes.

Egg Shells

Egg shells are a problem in two ways. If you grind them in the disposal, they become an abrasive substance that can actually dull the blades of your disposal. As they travel on, they contribute to a mass of material that can lead to a clog. If you’re trying to keep them out of the trash, they are an excellent addition to your compost pile.

Coffee Grounds

Word has it that plumbers count coffee grounds among the most common causes of kitchen sink drain clogs. You can put them in the trash, or if you are a gardener, you can put them around acid-loving plants such as azaleas, roses, blueberries, lilies and evergreens.

Stay Ahead Of Trouble With Regular Roof Inspection And Maintenance

What is roof safety?

What is Roof Safety?

Roof safety is a system of preventive measures when performing work and repairs on rooftops because it is one of the most dangerous jobs in the construction industry. Falls are the leading cause of death in the construction industry, and the Occupational Safety and Health Administration (OSHA) cites that falls from roofs account for 34% of all fall deaths.

5 Common Rooftop Safety Hazards

To protect roofers from serious injury and death it is important to identify hazards when working on rooftops and to follow critical safety steps to control these hazards. Below are the most common rooftop hazards that should be identified and controlled to keep roofers safe:

Fall Hazards

Always watch out for fall hazards when working at heights. Basic questions to ask yourself and your team should be: Is the structure strong enough to support the weight? Are there holes to watch out for? Are guardrails available for workers? Are ladders properly placed and not defective? Use an inspection checklist to ask the right questions and assess fall hazards when working from heights.

Power Tools

Power tools are essential when working on rooftops. However, if improperly used at heights, power tools can inflict serious damage to workers as well as cause slips and falls. Ensure your team is properly trained to handle power tools and that they are not defective.

Electricity

The construction industry is most at risk from electrical hazards, accounting for 52% of all electrical fatalities in the US workplace. Workers most at risk of electrical hazards include those working on rooftops and near power lines. Improper handling of electrical equipment can cause massive electrical shock, burns, fires and death. Conduct regular electrical safety checks to identify and control possible causes of electrocution to prevent accidents.

Hazardous substances

Common hazardous substances when working on rooftops include exposure to asbestos, paint fumes and harmful chemicals. Check for substances that may harm workers on-site and take appropriate action including proper storage and safe handling of hazardous substances.

Extreme temperatures

Whether it’s the heat of torches used for roofing or extremes in weather, workers must be protected from the dangers of extreme temperature by identifying the risks brought by equipment or current weather conditions. Have your team perform a toolbox talk before your shift to decide whether you should commence work for the day.

Roof Smarts

When it comes to roofs, even the best safety equipment is no substitute for common sense and good judgment. Here are some tips for working safely on a roof:

  • Leave steep and/or high roof work to the pros. The few dollars you’ll save by doing it yourself aren’t worth the risk of death or a lifelong disability if you fall.
  • Pick a clear, calm, cool time of day to work on roofs. Wet roofs are slippery. Wind also poses a danger, and excessive heat softens the shingles, making them vulnerable to damage.
  • Wear shoes with a soft rubber sole for extra traction.
  • Keep the bottom of your shoes free of mud and dirt, and the roof swept clear of dirt and debris.
  • Rope or mark off the ground beneath your work area to let people below know you’re working above. Even the most careful worker eventually drops a tool off the roof. Always look and call out before tossing anything down.
  • When you’re not using your power tools, secure them with short lengths of rope or Bungee cords. Keep hand tools and supplies in a 5-gallon bucket hung on a roof bracket. Carefully position ropes and extension cords so they’re not underfoot; they’re very slippery.
  • Stay off slate and tile roofs. Loose tiles or slate can fall out and the surfaces are easily damaged if you’re not experienced.

Common Rooftop Safety Hazards

Every time you or your team access a rooftop you should take every precaution and avoid hazards and dangerous situations. But sometimes we all need a reminder about what specifically to lookout for, so we’ve compiled this list of the top 10 hazards you should be aware of before you access a rooftop.

  • Roof Stability – Is the roof strong enough to support the weight of a human? Are the trusses intact? Will the roof bow on a hot day? Check the underlayment before going onto the roof.
  • Ladder Security & Placement – Is the ladder secure and at a 4:1 angle? Are the feet secure? Is the top above the roofline and tied securely A number of fatalities occur each year because of a poorly placed ladder. Always inspect your ladder and the area around your ladder prior to use.
  • Weather Conditions – Ice, snow, and wind are always a hazard on a roof if the shingles or other surfaces are slippery. Membrane roofs are especially slippery in wet conditions and should be avoided under these circumstances.
  • Roof Holes – Unguarded skylights and poorly covered holes. Without fall protection, an open hole on a roof can be just as deadly as the roof edge, and according to OSHA 1910.23(a)(4) requires a skylight screen or railing on all exposed sides.
  • Edge Awareness – Losing the edge of the roof can be a problem when you are engaged in roof work. Some employees get so wrapped up in their project that they forget where the roof edge is.
  • Improper Training – If there is someone on the roof who has not been properly trained, they are a rooftop safety hazard and could cause serious injury to themselves or others.
  • Improper Use of Fall Protection Equipment – Such as: poorly anchored railing, lanyard too long, or a weak tie-off point. Understanding and training on how to properly use fall protection equipment is critical.
  • Poor Line of Sight – Ridge vents, chimneys, shingle bundles may block egress on a roof. Maintain a good line of sight so that you know where you are in relation to the roof’s edge.
  • Pitch – The steeper the roof is, the easier the fall. Ensure that the fall protection and shingle bundles are secure before setting foot on the roof.
  • Split Level Roofs & Fall Heights – Employees engaged in roofing activities on low-slope and split-level roofs with unprotected sides and edges 6 feet (1.8 meters) or more above lower levels should have the proper fall protection equipment.

Roof Safety Signs: What They Mean and What to Do

Safety signs are generally categorized in three types—danger signs, warning signs, and caution signs. When working on rooftops, roofers will usually encounter the following examples of roof safety signs and what they should do:

Danger Sign

When there is a roof safety danger sign, there are immediate hazardous conditions that will lead to serious injury and death if not avoided. Upon seeing this sign before any roofing work, avoid it at all costs.

Warning Sign

When there is a roof safety warning sign, there are existing life-threatening hazards that can lead to serious injury or death. Accessing roofs by permit means that only authorized personnel or trained employees can be on it. Warning signs represent a hazard level between danger and caution, needing specific precautionary measures to be taken.

Caution Sign

When there is a roof safety caution sign, there are minor hazard situations where a non-immediate or potential hazard or unsafe practice presents a lesser threat of employee injury. Roofers should be mindful of caution signs and apply necessary control measures in any roofing work.

Top 5 Safety Precautions for Roofers

  • Always begin with your Pre-Start Talk

Make sure you always conduct a 5-10 minute pre-start talk with all workers before commencing work on a rooftop. Discuss common hazards present (like the common hazards above), assess the condition of the work area, confirm that proper permits have been secured, and encourage the team to verbalize the safety tips to follow. Using a pre-start toolbox talk template can help your team communicate and record their daily safety conversations.

  • Work only during good weather conditions and avoid extreme heat/cold

Not only does extreme weather cause slips and falls, it can also hinder proper execution of roofing work (roof shingles not sealing down). A wet roof is also a huge risk for slips and falls. Better side with caution and always wait for ideal weather before you begin roofing work.

  • Ladders should be stable and properly secured or tied off

Always make sure that there are enough ladders for the job and that they’re all safe to use. Check your ladders for safety as some of them may need repair or replacement to prevent fatal accidents or injuries.

  • Wear proper PPE

Wearing proper PPE such as helmets, shoes with traction, and fall protection harnesses can help save you when slips and falls occur. Perform regular PPE checks to ensure your team is properly equipped.

  • Carefully position ropes and extension cords so they’re not underfoot

When not properly handled, ropes and cords not only hinder workers’ movements, they can also cause fatal accidents. Always follow proper use of ropes, cords, and safety harnesses.

How To Find Environmental Friendly Residential Painting

HOW TO PAINT THE EXTERIOR OF A HOUSE USING AN AIRLESS SPRAYER

PROJECT OVERVIEW

Update the look of your house with a fresh coat of paint. sprayers are easy to use and you’ll finish in a fraction of the time it takes to paint with a traditional roller or brush.

Safety Notice: Whenever operating spray equipment, take proper safety precautions, stay alert, and be mindful of potential hazards. Wear protective gear such as gloves, safety glasses/goggles, spray sock (hood), hat, proper footwear, dust masks and respirators. Make sure there is adequate ventilation. If you’re painting in the vicinity of appliances, turn them off. (See Safety Precautions in your Sprayer Operation Manual.) Always refer to the specific instructions and safety procedures for the spray equipment you are using.

SUGGESTED TOOLS & EQUIPMENT

Magnum, or TrueCoat Paint Sprayer (visit Paint Sprayer category page to compare models)

Paint/Stain

Spray tips – a wider spray pattern for large surfaces and narrow size for smaller surfaces (see tip selector)

Empty buckets for priming sprayer and cleanup (two needed)

Stir sticks

Paint strainer bag – helps prevent tip plugs and provides a better finish

Tarps, drop cloths, or plastic sheeting

Masking tape

Paint brush for touch-ups

Magnum tip extension (optional) – for hard-to-reach areas that would otherwise require a ladder

Pressure roller kit (optional)

Additional airless hose sections if needed

Spray shield

Pump Armor storage fluid (see pump protectant product details)

Cleaning rags

Stiff nylon brushes for cleanup

Safety and protection equipment – safety glasses/goggles, dust mask/respirator, spray sock or hat to cover head

GETTING STARTED/PREP

Before you paint the exterior of a house, it’s best to start by moving all outdoor furniture or any other items such as a grill away from the area to be sprayed. Allow plenty of space for your tools and equipment. Tape off any trim, and cover any surfaces you don’t want sprayed such as windows or shrubs with plastic


Use a pressure washer and cleaning solution to wash the entire exterior surface, including any eaves or soffits, that are to be painted. Allow surface significant time to dry.

Remove any dirt, mildew, or mold, and scrape off any peeling paint.

Repair any damaged siding, soffits or trim. Drive any loose nails flush. Sand any rough surfaces and caulk gaps as needed.

EXTERIOR PAINT SPRAYING

Select the spray tip that’s best suited for the paint you are using and the surface to be sprayed. Be sure the tip’s hole size does not exceed the maximum capacity of your sprayer (see spray tip info). If you’re using paint from multiple containers, mix it together in an empty 5-gallon container to ensure consistent color even if small color differences exist between individual paint cans.

If you don’t have a lot of spraying experience, choose a flat surface such as the side of the house or other area that won’t readily be seen to begin on. Start at the top of the area and work your way down, first spraying any eaves or undersides of any overhangs. The direction you will spray depends on the construction – as a general rule, spray any exposed trusses, wood beams, or boards by aiming the spray fan pattern to follow lengthwise.

Home Painting Apps

Technology has been playing a role in the way we approach home improvements and DIY for generations. However, it’s only as of relatively recently that we’ve begun to explore the true power and potential of the devices sitting right there in our pockets. It’s hard to believe, but one of the biggest sources of help and inspiration for your next home paint job could turn out to be your smartphone!

All over the world, software developers are frantically throwing mobile apps in all manner of guises — all with the same primary purpose. From color-selection to choosing the right themes for your home’s interior and so much more, it’s almost like having your own interior design team at your fingertips at all times. And when it comes to taking inspiration from your surroundings…well, let’s just say it’s never been easier to convert your exterior or interior house painting ideas into reality.

Work with the right apps and the days of endlessly experimenting with sample pots might well be over! So with this in mind and to help make sense of the thousands of apps all gunning for the same glory,

First up, one of the very best apps on the market right now for experimenting with a world of colors is Paint My Place. Particularly effective when used with the home’s exterior, it’s basically an app that makes sample pots and paint swatches redundant. All you need to do is take a picture of any area of the property’s interior or exterior, in order to get busy with endless colors and schemes. It features a huge selection of colors from the biggest paint brands in the world, in order to give you an accurate idea of how each would look if you went ahead and used it.

Offered free of charge courtesy of Home Depot, Project Color definitely lives up to its name. The app has been designed around three primary functionalities — See It, Match It and Find It. As the names suggest, it’s all about seeing your rooms with the color schemes of your choosing, matching colors for total cohesion and finding the colors of your dreams with ease.

Perfection Painting

Eco-friendly products for exterior and interior painting are getting a lot of attention these days and rightfully so. Saving the environment means eliminating those harsh and harmful chemicals anywhere can, and that includes the paint that use. Moreover, build a much healthier home for our family if use paints that are devoid of volatile organic compounds (VOCs), which are emitted as gases from a number of solids or liquids. These harsh gases may have long- or short-term effects that can adversely affect health as these can stay in your house for several years especially since VOC concentration can be up to ten times higher indoors compared to outdoors.

There are a number of paints you can use for your interior painting projects that are friendly to Mother Earth. Probably the most common in this category is the clay paint. Made from earth-based minerals and solvent that is mostly water, this type gives your home that earthy look and feel.

Containing a protein called Casien is milk paint used for painting interiors. Casien, when separated from milk and then mixed with clay, water and powder, forms a thick paint that definitely has no harmful effects to the environment.

Another notable eco-friendly product is lime wash, which is made from calcium-based minerals. When combined with water, it makes a simple natural paint. This type of paint can be used for your home’s interior and exterior although it only works for materials such as wood, plaster, brick and concrete.

important things to take into account before painting your exterior

Though it may not seem like it some days, spring is just around the corner – and there’ll be no better time to hit the ‘refresh’ button. While the change in seasons always offers a natural opportunity to declutter the interior of your home, spring is also a good time to give the exterior of your property a good clean, a fresh lick of paint and a whole new look.

Painting the outside of your house is a big undertaking that can require some foresight in order to get it right. Now is the perfect time to start planning so that you’ll be well prepared when the mercury finally starts to rise.

Existing conditions

Proper preparation is the most important consideration that will affect how good your home ends up looking – and how long it will stay looking good. Start by taking a walk around your property and assess the condition of your exterior, checking for any damage. If there are materials or sections that will need replacing, now’s the time to book your contractor to get the work scheduled in for spring

Most exterior surfaces will have also mould and possibly moss growing on them. Unfortunately, it’s not enough to remove moss and mould without first killing it as any residual spores will simply grow back underneath, and through, the new paint

all wash cars regularly, but homes don’t enjoy the same treatment. Ensure that the outside of your home gets a proper bath to remove contaminants, such as dirt, salt, mould residue (now it’s been killed), as well as poorly adhered paint and chalkiness, from old painted surfaces.

CAN I USE HOUSE PAINT FOR FINE ART?

How does house paint differ from artist paint, and why shouldn’t I use it for my paintings? For this post I want to examine the characteristics of house paints, how they differ from artist paints, and explain why they are not directly interchangeable. There are two main reasons why you might use house paint for your art. One reason is to save money by using household emulsion paint to prime your canvas. After all

maybe you want to make a comment about high/low culture, and juxtapose the mass-production aesthetic of lifestyle colours with your personal expression. You can use house paint for your art, but household paint and artist’s paint are by no means a direct match for one another.

The Function of Paint

Let’s think about this logically. House paint is for painting domestic interiors and exteriors, while artist paint is for painting works of art. How they are made is specifically tailored for their intended use. So if you are going to start using house paint in your works of art, you need to be prepared for the fact that it will always possess the characteristics that painters and decorators seek. Characteristics such as flat, even colour in a range of pre-mixed hues. Colours that are easy to live with when applied on walls from floor to ceiling.

How Artists have used House Paint in the Past

When an artist such as uses household gloss paint, she does so to reference contemporary culture – colours that reflect our lifestyles, advertising, consumerism. She paints shapes onto canvas with crisp edges, stripes and shapes, that remind us of buildings, slogans, and machines.

uses household enamel to paint his large scale canvases. He does so in pursuit of the sublime. The work suggests that the artist is interested in combining the ‘lifestyle ideals’ that are suggested by house paints with an intuitive way of working

Enhance Your Home With Carpet Flooring

Does vinegar kill Household germs in carpet?

In the ongoing battle between you and household germs, you may think germs have the advantage. Unlike you, they can be just about everywhere at once. And when it comes down to hand-to-hand combat, you may be too rushed or tired or just have better things to do. They don’t.

Yet keeping household germs at bay helps keep colds, flu, and other infectious illnesses from spreading. This on-the-go cleaning guide can help you get the upper hand with germs by focusing your efforts on the places where they lurk the most.

Where the Germs Are

As a rule of thumb, any area of your home with high traffic and surfaces that get touched a lot is a germ bank. Not all germs are harmful. But where there are germ strongholds, the conditions are favorable for disease-causing viruses or bacteria to lurk.

One study found the kitchen sink had more bacteria than the toilet or garbage can. The only bathroom hot spot in the study’s top 10 was the toothbrush holder. Why? Toothbrush holders are often near the toilet, and flushing sends a fine spray of mist onto them. Plus, it’s easy to forget about them if you’re focused on cleaning the toilet and more obvious germ hot spots.

Getting Started: What You Need to Kill Germs

Cleaning with soap and hot water removes dirt and grime and gets rid of some germs. It’s usually enough for many surfaces. But you may want to disinfect areas that are home to a lot of germs.

  • A cleaner-disinfectant can be good for speed-cleaning because it combines the two steps. You can use it for most kitchen countertops and bathroom surfaces.
  • Clean areas with sticky spills and dirt with soap and water. Then disinfect. To make a cheap, effective disinfectant, mix up to 3 teaspoons of bleach in 1 gallon of water. Never pair bleach with ammonia or vinegar.
  • Apply it and leave on for 3 to 5 minutes. Rinse and let air-dry to save time. Or dry with a clean towel.
  • Always wear gloves and open some windows when you use products with bleach.

If you’re using store-bought disinfectants, try not to breathe in the chemicals. Also remember to wipe down areas afterward with water or let cleaned areas, such as countertops, fully dry before you prepare food on them.

White vinegar or hydrogen peroxide are effective homemade cleaners. But never mix hydrogen peroxide and vinegar. And if you use hydrogen peroxide, test it first on an unseen surface to make sure it doesn’t discolor or fade it.

Can Vinegar Sanitize While Cleaning?

​Vinegar is also good for killing bacteria. However, it is not listed as a disinfectant due to the fact that it only kills about 90% of bacteria and not the required 99.9% of qualified disinfectants.

To use it as a disinfectant you would use straight vinegar. Diluting it with water makes it less effective. Also when you mix it with baking soda then it loses its ability to disinfect.

If you add baking soda while carpet cleaning then you will need to blot the area with clean water after and then re-apply only vinegar for disinfecting.

While it is not a great overall disinfectant, it still has the ability to clean and destroy most bacteria, including mold. This gives your carpet cleaning routine an added boost, especially when you are dealing with food or fluid messes that can contain bacteria.

How does it work?

Vinegar, be it white or malt or rosemary-infused, is about 5 per cent acetic acid. The acid kills bacteria and viruses, by chemically changing the proteins and fats that make up these nasties and destroying their cell structures.

When US researchers tested commercial cleaning products against alternatives like vinegar and bicarbonate of soda, they discovered that neat vinegar killed a range of household pathogens.

Science also tells us, for example, that vinegar will kill off the flu virus.

As part of research aimed at preparing us for a flu pandemic, UK researchers found that malt vinegar, much like bleach and washing up liquid, can rapidly inactivate the flu virus.

More recently, US researchers from the Albert Einstein College of Medicine found that vinegar efficiently killed Mycobacterium tuberculosis — the bacteria that causes tuberculosis — after 30 mins of exposure to a six per cent acetic solution.

Professor Peter Collignon, an infectious diseases physician at the Australian National University’s medical school, says: “TB is a hard-to-kill bacteria, so the fact that it works against them means most other bacteria will likely be killed by vinegar as well.”

Indeed, it could even be an effective and economical solution to laboratories and hospital settings in resource-poor countries.

Is Vinegar Safe for all Surfaces?

​While it is safe for a lot of your surfaces, vinegar can be very harmful to certain surfaces.

It can damage almost all stone surfaces including:

  • ​Marble
  • ​Granite
  • Limestone
  • ​Travertine

Even a small amount in short contact can begin to etch away at these calcium-based surfaces. Instead use a safer carpet cleaner such as dawn dish detergent to scrub these surfaces.

You will also want to avoid using straight vinegar on any wax sealed surfaces such as sealed wood furniture. Instead opt to use a diluted 50/50 vinegar and water solution to clean any stubborn grime from these surfaces so that the vinegar won’t strip the wax.

When it comes to cleaning these surfaces you will want to avoid any cleaners that have highly acidic properties, such as vinegar.

How to disinfect carpet with vinegar using a steam cleaner?

  • Step 1: Make a mixture of vinegar and water. If there are no specific ratios given for the machine, you can try using one part vinegar to one part water. For severe cases, try getting the full strength vinegar. If soap-to-water ratios are given, replace the portion of soap with vinegar.
  • Step 2: Carefully fill the detergent compartment with the solution. Make sure to not overfill it as it might cause damage to the carpet.
  • Step 3: Run the steam cleaner all over the carpets with the directions for the machine.
  • Step 4: Make sure that the carpet is completely dry before using. The vinegar’s smell will go away once the carpet dries.

Cooking Up A Small Kitchen Remodeling Idea

THINGS TO CONSIDER BEFORE BEGINNING YOUR KITCHEN RENOVATION

Do you sometimes just glance over at your kitchen and think about how dreary it is, then think about how it really could use a makeover? Do you then start contemplating undergoing a kitchen renovation, but immediately revert to being content with reality because you don’t even want to consider how overbearing the task would be? Maybe you just need a little bit of guidance, or maybe you just need to know where to start. Luckily enough

Know what you need

Before anything, you should look at your current kitchen and ponder upon a couple of things. What do I like about my kitchen that I’d like to retain in my new one? What do I utterly dislike about it that I wish would change after the renovation? These things can include not having enough storage, having better appliances, sparse space for people to move around in etc.

Inspire yourself

Get up to date on the latest trends and let your imagination run wild. Find ideas through Pinterest then scroll through and save your favorites in your own folder. Otherwise, jump on Instagram and search through various kitchen renovation hashtags or look at some of these pages that are filled with exceptionally beautiful feeds

Know your costs

A budget is important to have set for yourself early in the renovation process and it’s important that this budget takes into account all the annoying additional costs that may not be so obvious at first. To begin with, a good rule of thumb in estimating the amount you should spend in your renovation is by considering the overall cost of your home. The professionals in the industry suggest that remodels of a kitchen should amount to between 5 and 15% of your property’s total value. If you’re new to the scene or to the idea of a kitchen renovation, then 10% is a good guiding figure to start yourself with.

Visit a showroom

Visiting a showroom is extremely helpful for numerous different reasons. For one, it can be a source for inspiration with all the model displays and products. On another hand, it allows you to add an extra sensory element to your ideas as you are able to experience in person how the material feels, what it looks like upon closer inspection or even how the doors sound when they close. What is especially helpful is seeking information from one of the in-store consultants. Consequently, you can receive direct feedback for what you’re planning to do, answers to inquiries you haven’t yet been able to resolve and even look into the next step for your home project.

Things to Consider: Minor Kitchen Updates

The kitchen is the equivalent of the Beltway during rush hour on a Friday afternoon. It is the most heavily-used part of a home, giving it the starring role in most reno dreams. In fact, many homeowners say a key reason they choose to take on a kitchen remodel is their discontent with the space.

And the kitchen can make or break future real estate deals. Whether the cabinetry is outdated or the walls feel like they’re closing in, it may be time to evaluate the functionality and the layout of this room. The good news is minor kitchen remodels are a popular trend for those homeowners who need change now—and the right choices can stretch that resale value, even without a huge budget in place.

Declutter with expanded counter and storage space.

Too many cooks in the kitchen can create a quick traffic jam. A top complaint of homeowners is functionality of space. By adding counter space or an island, this room can be more user-friendly, and you may actually look forward to being in it. More meals cooked at home equal less money spent on takeout. Plus, carving out more storage space—like drawers or a pantry—can help with organization.

Improve design with updated cabinetry and hardware.

Yes, you can accessorize your kitchen. Instead of a full gut job, a minor kitchen remodel could be as simple as new paint and hardware. White is a trending non-color color for contemporary kitchens, and it can brighten up the space.

Go green with new appliances.

Going green isn’t only good for the environment—it also improves your bottom line. Old appliances are less efficient; therefore, they impact your utility bills in a negative way. For example, ENERGY STAR refrigerators use 40% less energy than conventional ones made before 2001 do

Commandments of Kitchen Renovation

Last week we announced the winner of our first annual kitchen makeover contest, The Big Reveal! But now that we have the voting out of the way, let’s look at the useful and interesting advice every single entrant learned from their real-life kitchen renovation. What makes for a successful kitchen renovation? What’s important? What’s not?

asked every Big Reveal contestant to share their best tips for a successful kitchen makeover, and they all offered great advice that often aligned with other discussions we’ve had on this topic. They also converged on a few themes that we heard about before, and altogether we think this is a collection of the most essential advice for a smooth kitchen renovation process.

Of course, commandments are made to be broken, and while we think all of these tips are super helpful, they don’t always apply to every single kitchen. I know that I broke at least a couple of these in my own kitchen renovation process, and all turned out fine!

Cook in the kitchen and understand your workflow before making changes.

Don’t rush into the renovation process. If possible, wait and use your kitchen in its broken-down, non-optimized state. This will teach you how you want to use it and the arrangement that will actually help your cooking.

Understand what will actually save money.

We often go into renovations with inaccurate ideas of what will save money. Understand the biggest ways to save. DIY isn’t always cheaper, replacing an appliance can save money in the long run, and keeping your current layout and reusing materials can help a lot!

Kitchen Remodel: Factors Homeowners Should Consider

Your kitchen is arguably the heart of your home, and if it doesn’t meet all your needs and wants, a kitchen remodel might be in order. A lot of families look at their kitchen as an intimate hallowed space that’s the very center of daily activity. And while a kitchen remodel might seem daunting, it’s an incredible opportunity to boost your home’s value, as well as the effectiveness of the room.

Things to Consider Before Your Kitchen Remodel

Home Value After a Kitchen Remodel

Because the kitchen is so vital to your home, it can drastically affect the marketability of your home, as well. An attractive kitchen is one of the first things prospective buyers will notice. Ultimately, it increases the likelihood of getting close to your asking price when you do sell. Furthermore, for many buyers, your kitchen is a statement as to how well the previous owner cared for their home.

Low-Interest Rates

Interest rates are in a constant state of flux. If you’ve been considering a kitchen remodel but the interest rates turned you off, we have something for you to consider. If you have accumulated significant home equity and have a good credit score, be on the lookout for a season of low-interest rates. This is the ideal time for you to take the plunge.

Wear and Tear

Outdated appliances, missing handles, broken cabinet doors, peeling countertops, and cracked tiles hardly scream “gourmet.” Unfortunately, they also leave a sour note on prospective buyers and current homeowners, alike, simply because they’re unappealing. Kitchen and bath remodeling often comes down to remedying a badly deteriorated environment due to years of unattended wear and tear. In this case, the current kitchen has outlived its purpose and needs to be remodeled.

Energy Efficiency

Many a homeowner want to decrease their carbon footprint and lower their energy consumption at the same time. This is a worthy and necessary goal. Energy savings are an environmentally friendly and financially prudent reason to embark on a kitchen remodel. For example, kitchen skylights channel more sunshine reducing the need for artificial light. Furthermore, solar headers and energy-efficient appliances work together to reduce your power bill and negative impact on the environment.

Things To Consider Before Choosing Kitchen Cabinets

The Difference Between Custom and Semi-Custom Kitchen Cabinets

Custom cabinets offer nearly limitless options in wood types, colors, sizes, and finishing options, and they’re built to your exact specifications. Usually you’ll start with a standard size cabinet and add on the details and features you want. Depending on the level of customization, price, quality, and delivery time can vary widely.

Semi-custom cabinets are available in more styles, features, and options than stock cabinets. This gives you more flexibility and design influence and ensures a tailored fit that’s perfectly personalized for your kitchen. The price for semi-custom cabinets will vary depending on the materials used and the amount of customization you choose to do. However, since customization options are limited, the expense still comes in at significantly lower than fully customized cabinets.

Which Material Matches Your Lifestyle & Budget

When it comes to cabinets, there is no shortage of options to choose from. Most of these options are wood or wood-based. If you want to go with all-wood cabinets, you’ll be choosing from either hardwoods or softwoods. Hardwoods include oak, maple, and cherry. Softwoods include evergreens such as cedar, pine, and spruce. Woods have natural color variations that can be enhanced by whatever finish you choose, making your end result quite unique.

The Variety Of Cabinet Finishing Options

Your cabinets aren’t done until they’re finished! Finishes are a great way to add beauty, depth, and a personal touch to your cabinets. But what finish options are out there, and what styles appeal to you? Popular finishing options include painted, distressed, stained, and aged.

Think about the type of finish that appeals to you and that might look good in your home. Choose something timeless that will age well, and consider how it will impact your kitchen’s design as a whole. Next, choose a finish you like (or two or three) and get samples so that you can see how it works with your other design elements.

How To Retain The Packing Services Of A Good Moving Company

Self-packing vs. full packing service – what to choose?

After you decide that it is time to move, there are many important questions you have to answer. Besides setting your moving budget and looking for packing services, there’s much more to it. One of the most important questions is whether to hire help for packing or pack on your own. The bottom line is to find the most efficient and economical way to move. But, there are always two sides to this problem and both options have their pros and cons. Anyway, will try to help you with this article by breaking down the advantages and disadvantages. Here is guide to help you decide on self-packing vs. full packing service.

Let’s start with breaking down the problem- self-packing vs. full packing service?

The question of all the questions is to pack or not to pack. Meaning that numerous factors will influence your decision to pack by yourself or hire professional help. The first thing you should think about is the amount of final moving costs. As many people have limited budgets for moving, therefore, for packing also. You have to think about how much time you will have for other tasks. So, if you have to save some money, self-packing is the option for you, but it will take you time. On the other hand, full packing service is the option for you if you’re in a hurry but prepare extra money. The important thing is to make a decision that’ll best suit your needs when it comes to the packing method. Sometimes deciding between self-packing vs. full packing service isn’t easy.

Pros and cons of full packing services which will help you decide- self-packing vs. full packing service

If you don’t have too many belongings to move, the situation is quite easy. You will be able to manage the relocation by yourself. It is the same if you have to move across town. Yet, if you have too many items such as furniture, that’s a different story.

In the matter of self-packing vs. full packing service, here are the pros of full packing services

If you decide to take the responsibilities off your back, hiring a full packing services moving company is your choice. They will guarantee several things.

Efficient packing: Moving professionals know how to use the optimal capacity of the moving boxes when it comes to packing. They have the knowledge and experience to load the boxes in the moving trucks and rationally use the space. Also, you can be sure that they will take all the necessary measures to prevent any damage. You won’t have to worry about the possible shifting inside the moving box during transportation.

Impressive speed: Professional packers have a packing strategy for every situation. So, no matter how large your home is, they will have the right solution. All in all, they will need several hours to get your entire household packed in boxes.

Quality packing materials: Every professional moving company uses new moving boxes and top-quality paper and tape. Hence, your items will be safe during transportation.

The downsides of full packing services compared to self-packing

There is always the other side of the coin that will influence your final decision. So, here are the downsides of full packing services which can eventually make you chose self-packing. You have to think over before deciding- self-packing vs. full packing service?

Moving Labor Service

One of the most frustrating and time-consuming parts of moving is packing. Strategic planning can be a hassle when you’re trying to find the right boxes for all the items. You need to make sure that all your related items are grouped together, while trying to make use of space efficiently. And if the pressure of doing that wasn’t enough, you also have to ensure that you don’t over-pack or under-pack a box so that the risk of breakage is less. All of these are prolonged, stressful and exhausting processes that you’d much rather do without. Hire one of the best moving and packaging services in Seattle to make your moving experience fun and stress-free!

Moving Supplies

If you would like to use boxes or other moving equipment not provided by for packing, have the professional-grade resources to ensure that your belongings are safe. With normal sizes or specialty boxes for your TV, wardrobe or mirror, ask about prices today!

If you would like to pack yourself, just remember that it takes a certain amount of planning and strategy in order to use your space efficiently and ensure that your belongings are safe. Some important things to remember when packing are:

Do not over pack boxes. The best way to do this is to use smaller boxes for heavier items.

Avoid mixing items from different rooms into the same box, that way your unpacking process will be that much easier.

Pack and unpack over a padded surface to protect from breaking items.

Always use packing paper for delicate items.

PACKING AND UNPACKING SERVICES

Moving Company offers packing and unpacking services along with the packing materials needed for your job. On the in-home estimate, the estimator will make a count of all the materials needed along with the time it will take to properly pack all the items discussed. Once the evaluation is done, a price is given for the packing services along with a timeline of how long it will take. Most pack jobs are done the day prior to the actual move. This ensures everything is ready when the moving crew arrives and the move will be done as efficiently as possible

Moving Company only uses the best packing materials and movers are trained to pack everything properly so that it arrives in your new home in the same condition as when it was packed. packing crews will label the boxes as they are packed and ensure the contents are safe for transportation.

The service of packing and unpacking takes responsibility and patience to complete satisfactory and without damage. On a pack and move

Packing refers to properly boxing up any loose items typically smaller than a microwave oven. Examples of items to be packed would be knick knacks, books, dishes, pictures, small lamps, linens, and breakables

Moving will arrive with all the necessary materials to complete the pack properly. Since packing is time consuming, it is usually done a day prior to the move date. An estimate is required to determine the correct materials needed and to calculate cost.

PACKING AND MOVING SERVICES

Packing can be one of the biggest challenges of your move. Consider using professional packing and moving services. Whether you need to pack your entire home, or just a few fragile items, can help. professional packing service can offer you convenience and peace of mind. professional packers are trained in packing methods proven to prevent damage during transit.

Loading or Unloading Service Also Available

Moving can also help you load your portable storage container or rental truck. professional movers will arrive with hand trucks and dollies to help make your move go as quickly as possible. also unload rental trucks or storage units

Professional Packing and Moving Services

All aspects of moving can be stressful, but packing your household goods can be one of the most daunting aspects of your move. Let Moving & Storage take this demanding task off your hands with packing services. friendly, professional packers are trained to handle your household items as if they were their own.

Good packing is essential to the success of your move and assures that your household goods will be protected until the time they are delivered to your new home. professional packing service uses only the best methods and the best packing materials to ensure your peace of mind. can pack your entire home or only what you need – whatever is most convenient for you. Some people want complete, turn-key packing. Others prefer to pack most of their own things, but want the professionals to handle the packing services for their fragile and difficult items such as dishes, mirrors, artwork, and chandeliers.

Packing Materials

If you wanted to do the packing yourself, always provide customers with packing materials at a wholesale rate and will even deliver orders over $100 for free. offer packing kits for different sized homes as well as individual boxes, packing paper, packing tape and moving blankets. Unused boxes can be returned for full credit.

Moving Tips and Tricks the Pros Do That You Can Too

When it comes to moving, the days of stuffing everything into your car and leaving your junk on the curb are over.

You could hire someone to do the whole thing for you, but that could cost you thousands of dollars. And with a whole house full of stuff, you don’t have the time or energy to just wing it anymore––so you need all the moving tips and tricks you can find.

If you want to make this your best move and save time and money, you need advice from the pros. And not just self-proclaimed pros, real moving experts who have spent years mastering the best ways to move.

That’s right––we got tips and tricks from founders of innovative moving companies, the creator of a professional organizer company, and a top real estate agent who has completed over 1,000 real estate transactions.  We have every hack, tip, and trick these real pros do that you can too

Get utilities up and running by moving day.

“Make sure you transfer the utilities before you close escrow, otherwise you’re going to have a weekend without electricity and water,”

Career As A Wedding Photographer

What equipment do you need for wedding photography?

Weddings are vibrant and full of emotions, making it all too easy to have a purely romantic view of the day. For the couple and guests, that is very true. However, if you are a supplier on the day, it can be a very different experience. All the more if you are the wedding photographer! The pressure is on, and you have a huge responsibility to capture the day.

When you first begin photographing weddings, it is important to have a love for weddings and a connection to the occasion. If you hate weddings – which some people do – I suggest you steer clear of wedding photography. It is also beneficial to have a creative eye. If you lack both, it will be apparent on the images you capture.

When starting as a wedding photographer, it is quite understandable that you may not have the full arsenal of cameras, lenses, flashes, etc. Often we start with only the basic equipment in our bag and plenty of creativity (and for some, a healthy dose of confidence).

If you are considering being a wedding photographer and exploring what you can achieve with a basic kit, then this article is for you. These are also just my suggestions. I do not assume that you could not become a competent wedding photographer otherwise.

Camera and backup camera

I actually bring three cameras so I can shoot with two and have one additional as a backup, but I think only two would get the job done. It is essential to have a backup in the event that something goes wrong with your primary camera — and there are so many things that can go wrong.

Medium zoom lens

I use a 24-70 f2.8 as my medium zoom and the lens that is on my camera most of the time. This focal length is great for wedding portraits and photojournalism, offering both wide and tight perspectives. The pretty wide aperture gives me some flexibility in spaces that aren’t very well lit.

Telephoto Lens

You will need a longer lens to capture events from a distance, in particular the ceremony. I like to stand toward the back or sides of a ceremony as to not be blocking anyone’s view and taking photos from a distance with my 70-200mm. I also use this lens for closeups of the first dance.

Wide angle lens and prime lenses

These are not as essential for a wedding, but are certainly nice to have. The wide angle can get you shots of architectural details or big groups. The prime lens can allow you to shoot in dark spaces and give you dreamy depth of field.

Memory cards and batteries

Always bring more cards and batteries than you think you need. I will shoot 50-60 GB of images for a wedding and go through two sets of batteries per camera and per speedlight. Make sure the batteries are all charged up in advance.

Other Helpful Equipment But Non-Essentials

The following can come in handy but in my opinion, you can do without them:

  • Grey card – You shoot at a fast pace in various lighting scenarios during a wedding – indoors, outdoors, tungsten, LED, natural lights, etc. It would be crazy to use a grey card every time you moved! You can shoot in Kelvin or use Auto White Balance. The important thing is that you shoot in Raw so you can adjust the white balance in post.
  • Reflector – I used to carry a reflector when I first started, but now I take my flash guns instead. And I never go without at least two of them! But a reflector is handy. Because I don’t carry one with me most of the time now, when I shoot small details, I use a small piece of white card or anything white that may be handy.
  • Tripod – I never carry a tripod as I find it too cumbersome and heavy! But you’d never see me cover a wedding without a monopod. They are easier to lug around!

Non-Essentials That Add Value to Your Service

Brides are often grateful when you magically produce things that they did not expect you to have. For instance, bobby pins, hair grips, scissors, or tissues. Likewise, if you help in other ways when you can, for example, putting the buttonholes on, helping with jewelry, etc. As they say, it’s in the little things.

Camera bag

You will need something to put all your gear in. Make sure it’s big enough and comfortable enough to haul around with you as you’re moving throughout the day.

Studio strobes and umbrellas

Some people may disagree with me that this is essential, but I like to have powerful strobes (more power than speedlights) to use on formal portraits if I need them. Sometimes, it rains or is too cold and I’m forced to take formals in a dark church. In this case, I like have the speed and power of strobes to evenly light up a large group of people.

Lens cleaning kit and lens hoods

It’s possible for the lens to get dirty or wet throughout the course of a quick moving event, so it’s good to keep a cleaning kit or lens wipes with you to keep smudges from ruining your shots. Lens hoods are a good way to keep lenses from getting dirty in the first place and also serve to keep sun flare down.

Good Communication Skills

Make sure that before a wedding day you’ve discussed with the bride and groom their expectations as well as yours. I send out a multi-page questionnaire with my contract that asks for the names of all the vendors, bridal party, and parents as well as special issues regarding families that I should know about. (I’d rather know that Mom and Step Mom don’t get along before the punches start flying when you try to get them in a “one big happy family” photo). In the questionnaire, I also ask the bride to circle adjectives about the feel of her wedding day and her style so that I can know her personality and her expectations a little better.

Introducing yourself to all the wedding vendors that day there also is a proactive way to help things run smoothly. Not only does it make life easier if you all work together, there’s always the possibility of future weddings together and referrals as well. It always makes the job more fun when you enjoy the people you work with and photography is no different.

  • The Coordinator:  The first person I usually introduce myself to the the wedding coordinator (or the person in charge of the venue if there isn’t a coordinator). They can help make the day run seamlessly and figure out how to sneak your couple away during the reception for those awesome sunset photos.
  • The Videographer: The videographer is also an important person to befriend as they will be right by your side almost the entire day and you will most likely get into each others’ shots at numerous points throughout the day.
  • The Officiant: Before the ceremony, I also pull the officiant aside and ask him if he has any restrictions or instructions for me (which in the light of this recent viral wedding video when the officiant interrupts the ceremony to tell off the photographers, is a really good idea). At this time, I request that when the officiant pronounces the couple as husband and wife and allows them to have their first kiss, he move to one side so I can get a great shot of my bride and groom. (The shot at the top of this article was thanks to the officiant who was delighted to comply with my request).
  • The DJ: The DJ is usually super cool about helping you work with the schedule for the remainder of the day especially giving you warnings about surprise speeches during your dinner break when you’re trying to shovel a plate of food in your mouth in 60 seconds or less.
  • Everyone Else: I also make sure I introduce myself to the banquet/catering manager, florist and make-up artist as they are a good source of referrals for future weddings.

Finding The Right Immigration Lawyer Made Easy

How do I write an letter to an immigration lawyer?

An immigration lawyer practices law independently of the U.S. immigration authorities. He or she helps clients handle the wide range of issues that are related to visas, U.S. citizenship, green cards and other things.

​Since immigration law is federal, people can get an immigration lawyer from any state as well as if they live outside the country. However, people who just want to visit the U.S. for 90 days or less do not require the help of a lawyer, but the immigration laws are very complicated and constantly changing, and for all other purposes, it may save the applicant time and money to hire a lawyer. Failure to follow the application procedures correctly may result in long delays to process the application.

An experienced immigration lawyer will not only fill out all forms, he or she will also review the specific facts of the client’s case, select the appropriate legal remedies, find any possible pitfalls or liabilities associated with the application and guide the case through the federal agencies.

The main reasons why a person may require a lawyer are:

  • Uncertainty about immigration benefits such as a green card or citizenship
  • To request asylum or a waiver to get an exception
  • To get help for removal or deportation proceedings
  • To request to return after deportation​​​
  • An immigration application has been denied
  • To stay in the U.S. after committing a criminal offence
  • A U.S. employer has not assisted in the immigration process
  • The application process and forms seems too long and confusing
  • An application for an investment-based visa​

Selecting a Lawyer

After selecting a lawyer, the person should write a letter that explains in detail their situation. After sending the letter, they may call the lawyer to schedule an appointment. The aim of the letter is to give the lawyer an idea of what may be involved with the particular client.

The lawyer will need all the necessary evidence to present a strong case for the client. However, if the client has already hired the lawyer, a formal letter may not be necessary. If he or she wants to check on the status of their situation, a phone call or email may be enough. In some cases, the lawyer will request a letter and give a list of questions that need to be answered. The letter need not be in perfect English, but the meaning must be clear.

Give Details About the Case

The first paragraph should state the name of the applicant and the reason for writing the letter. The second paragraph can have any details that may pertain to the case such as the client has been deported, is married to a U.S. citizen or has already studied the naturalization process.

​If there are any personal problems, they should only be mentioned if they directly relate to immigration. For example, if the person has family in the U.S. or a child who was born in the U.S.

Close With a Summary

Any relevant names and dates should be included in the letter. These details will help the attorney decide if he or she should take the case. The letter should contain a clear request for the help of the lawyer. It may close with a summary of the main point and should be polite and respectful. If it has a rude tone, the lawyer will most likely decline to help. He or she has no obligation to represent an applicant.

Below is a sample letter to an immigration lawyer. It is a formal business letter and should be sent by certified mail with a return request. The letter should be typed on a computer and printed or written in very legible handwriting. If any documents are enclosed, they should be copies. No original documents should be sent. If the attorney decides not to take on the applicant’s case, the documents may be lost.

Tips For Writing A Letter Of Appreciation To Your Immigration Attorney

If your immigration law firm was able to help you with a delicate matter, chances are you want to show your appreciation. By virtue of their chosen field of practice, immigration attorneys know about the difficulties their clients face, particularly in cases related to asylum, deportation, detention, and family-based immigration. San Diego immigration lawyers derive great satisfaction from their work, especially when they’re able to help their clients overcome the odds. Getting a written message of gratitude is certainly always appreciated.

Getting Started

When you sit down to write a thank-you message to your immigration attorney, take a moment to think about how much your life has improved because of the law firm’s work. Let’s say you got married overseas without knowing the best method for marriage-based immigration is to file a K-1 visa application and conduct the wedding in the United States. If your lawyer was able to bring your stranded spouse into the country, make sure to mention this in your letter.

Your Letter as a Testimonial

Client recommendations are like gold for all law firms, particularly those that practice in complex areas such as immigration. If you want your letter to be used by the law firm as a formal recommendation or endorsement, say so explicitly in a separate paragraph. If you’re writing in a language other than English, you may want to give the firm permission to use a translated version of your recommendation so it can be posted on the law firm’s website, included in a newsletter, or framed and displayed at their office.

Forms of Presentation

Emails and direct messages are fine, but there’s nothing like the feeling of receiving a letter written on paper. Your letter doesn’t have to be handwritten. You can type it on a computer and print it out, but make sure to personalize it with your signature and a short greeting in your own handwriting. A colorful thank-you card is also a nice touch because it can be displayed on a desk and shared with other staff members at the office.

Format to Follow

When it comes to expressing gratitude, sincerity is always the most important element, but you can also follow this simple format for thank-you letters:

Start off by explaining what you’re grateful for.

  • Include some specifics about how the law firm’s work, guidance, and experience were helpful in your case.
  • Write about how you felt when you or your relative finally arrived in the U.S. or about all the things you’ve been able to accomplish since you received your green card.
  • For a conclusion, you can use standard closing phrases such as “best wishes,” “sincerely,” and “thank you again.” If you feel inspired to include some emotion, don’t be afraid to write it out. Your attorney will know if it should be excluded from a testimonial.

Understand your purpose.

There are many reasons why you may wish to contact your attorney. Understanding that reason is key to determining whether a letter is the appropriate course of action and, if so, to writing a letter that clearly communicates your message.

  • If you merely wish to inquire about the status of your case, a formal letter is not necessary. Your lawyer is obligated to keep you reasonably informed about the status of your case and will likely contact you whenever there is news to report. If you have not heard from your lawyer in a while, send him a quick email or leave him a voice mail message asking for an update.
  • If your lawyer has requested that you write him a letter, follow his instructions his exactly. For example, if he sends you a list of questions to answer, simply answer his questions one by one as clearly as possible. Do not worry about formatting the letter in any special way or typing it unless your attorney requests that you do so.
  • If your lawyer has asked that you write him a letter giving your consent to his requesting documents on your behalf, you should ask your lawyer to write the letter for you. This kind of letter may need to meet certain criteria to be effective and your lawyer is the one who will know what the letter needs to include. Your only role should be to revise and sign the letter once you have received a draft.
  • If you are concerned your lawyer is not working on your case, write him a polite but firm letter explaining your concerns. If you feel more comfortable emailing or calling him, that would be fine as well. You are under no obligation to express your concerns in a formal letter.
  • If you want to fire your lawyer, send him a letter that clearly states you are terminating the relationship and that the lawyer is to cease working on any pending matters. You should also ask that he return all of the documents regarding your case and pay you refund for any unfinished work.

Common types of immigration letters

There are different types of immigration letters, and they serve varying purposes. For instance, a good character reference letter for immigration can help an immigration officer understand better the character of the applicant. If the letter contains all the pertinent data required, an approval should be in the works.

Immigration officers don’t want unnecessary details contained in the letter. This could be reason enough for them turning you down. When you intend to write an immigration letter of recommendation, do some research about it first. Online resources such as this one provides a great collection of good moral character letter for immigration samples and other types of immigration letters such as:

Character reference letter for immigration

A character reference letter usually defines the person’s character, and this becomes an essential source in gaining benefits for the said person. As much as possible, make the best reference letter by downloading a template or create one on your own. You may even include the address of the embassy or state department where your friend plans to send his own application letter.

Make it a point to briefly introduce yourself and define your relationship with the applicant in the first part of the letter. Of course, when writing an immigration letter for a friend, it goes without saying that you will positively describe your friend’s character. If you can provide a short anecdote to prove this, do so. Then write your closing statement. Throughout the letter, maintain a polite and courteous tone.

Immigration letter of recommendation

When writing such a letter, pay attention to the details. Remember that first impressions always count. Creating a good letter can be a daunting task but using good moral character letter for immigration samples can make the job easier. After all, these have proven their effectiveness.

After going through some samples, you can interject your thoughts like adding a decent introduction to the letter and clearly explaining the good traits of your friend. If you have some added information relevant to the letter’s purpose, do so without hesitation. Then conclude your letter with a genuine compliment.

Reference letter for immigration from the employer

An employer making a reference letter for his employee for immigration purposes need not fret too much about writing one as there are also sample letters that can assist him. The formats of these sample letters generally include information regarding the employee and the employer.

The employer should identify himself by providing his name, company, address, and other information. Briefly describe your position in the company and that of your employee and provide positive information about him.

Relationship support letter for immigration

This type of immigration letter will involve your relatives trying to secure successful immigration approval. You can avail of several techniques when writing this letter. Again, start with a decent introduction followed by a description of your relative’s good character. If you have any supporting documents that can prove useful to illustrate this, include them. You can conclude your letter with a sincere compliment.

Posted inLegal